When Ben visited us this christmas gave me a copy of the beautiful Tartine bread book. Since then i’ve been learning to grow my own yeast and making experimental sour dough with varying results. I’ve been growing my starter, dubbed Eric/B, for almost a month without killing him and produced 4 good loaves using the basic Tartine recipe. An off-cut of of Eric has even made his way to South London in the form Eric/B1, a gift to our our newest munchmun.ch contributor, Kriss.
I promised Kriss a post explaining how and when to feed his new friend, but if you’re not using an existing starter then you can make your own really easily. Just combine 100g flour mixture and 100g water follow the instructions for feeding the starter while omitting the kept start and add extra flour and water. Leave it a couple of extra days to get going before feeding, then continue as normal. This guide is a bit rough, but should be enough to get you going,
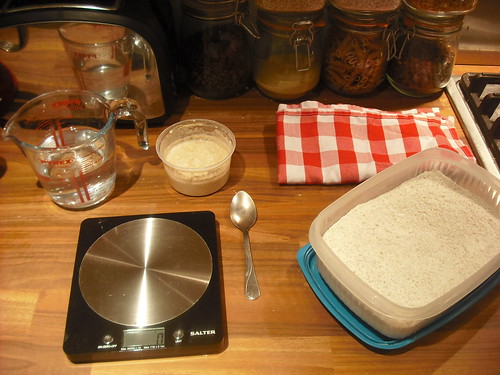
- A plastic tub to store the starter in. I’m using a supermarket humus-type pot.
- Kitchen cloth to go over the top of the pot, it might get messy. This helps avoid the mixture drying out too much/crusting on top
- Your flour mix, mine is 50% wholewheat, 50% white bread flour. Make a large batch of it up so you don’t need to mix it each time.
- Electric scales. You can use regular scales will do, but precision of digital and the easy of reseting to 0 make life much easier (I recommend these)
First question, what time to feed? I’ve been following the Tartine suggestion of doing it in the morning, but it seems theres no hard or fast rules. Find a time that works for you and stick with it, the most important thing is a consistant time. You’re “training” the yeast to rise and fall in cycle in preparation of using it to bake with.
Next, how does feeding work? The short version; remove 80% of the starter and replace the flour/water. This prevents the culture becoming too sour and vinegary while still developing the culture for baking with.
Take your existing yeast culture and clean off any dried bits round the top of the pot, or peel of any heavy crust that may have formed. Give the remaining mixture a good stir to get an even consistency, then remove all but 40g and reset your scales. Add 75g of your flour mixture and 75g of water and mix carefully. If you have a small pot then this will probably make a bit of a mess.
Pop the cloth over the top of the pot and put it somewhere with a reasonably warm consistant temperature. You can then decide how long you want to wait till feeding it again. Personally i’m feeding Eric once every 2 days, rather than the once a day I was doing, as i’m not actively baking at the moment and he was a lot of time/flour to feed everyday.
What if you miss a feeding? Don’t worry too much, it’s better to wait until the next planned feeding rather than feed out of your cycle. Your starter should be pretty resilient
I’ll be posting some recipes/pictures from my recent sough dough experiments soon, so once you have your own stable Eric you can bake with him. I just need to get the knack of it myself first, before I try and teach.
One Comment
Pam (sired by Eric, y’see…) has just been fed successfully for the first time. Looking forward to making my first load of sourdough.