A Come Dine With Me special

On holiday in the south of France last week with four other foodie types and some clever bod had an idea: why not make use of the local produce and the villa’s fab kitchen in a Come-dine-with-me-style cook-off? The Channel 4 TV show is one of my guilty pleasures so I was pretty excited when our names went into an ashtray (no hat was available at the time) and we were each allocated a course to cook.

The menu on the night was as follows:

Canapés
Chilled cucumber and dill soup
Pea and parmesan arancini
Mini moules mariniere

Starter (by @simongoble)
Fresh vegetable risotto with gorgonzola

Fish Course (by @COOKBOOK_HQ)
Cod with a herb and multi-seed crust, roasted vine tomatoes

Main Course (by non-tweeter Aaron)
Spicy Tuscan bean stew with chorizo

Dessert (by @dsingleton)
Pear tarte tatin and homemade lavender ice cream

I don’t really do delicate food – as you can see from some of the big old cakes that feature on this blog – so was initially dismayed when I drew the amuse-bouche/canapé course. I tried my best to scale down dishes that I would normally serve in great big bowls and, surprisingly, it turned out fairly well. So well, in fact, I thought I’d you’d like the recipes to have a go yourself (they serve five).

Chilled cucumber and dill soup

Ingredients

  • 1 cucumber, peeled, seeded, coarsely chopped
  • 1 onion, coarsely chopped
  • 250ml vegetable stock
  • 1 teaspoon dried dill
  • 125ml double cream
  • Salt and pepper, to taste

Instructions

  • Place cucumber, onion and stock in a small saucepan, bring to a boil then reduce heat and simmer until soft
  • Using a blender puree with dill and cream until smooth
  • Add salt and pepper according to taste
  • Pour into a container with a pouring spout
  • Cover and refrigerate to chill until ready to serve (I served mine in some swish looking martini glasses)

Pea and parmesan arancini

Ingredients

  • Approx 200g risotto mix (see recipe in link below)
  • 50g peas
  • 2 eggs, beaten
  • 100g breadcrumbs
  • 600ml oil for frying
  • Rocket leaves to serve

Instructions

  • Make up a basic risotto recipe. I have my own depending on what’s in the cupboard but you can find a easy-to-follow one here
  • Add a large handful of fresh peas and an extra 100g of parmesan to the risotto mix near the very end of it’s cooking time
  • Roll the risotto into walnut-sized balls
  • Dip the balls in the beaten egg
  • Coat the balls in breadcrumbs
  • Deep-fry in the hot oil for 2-3 minutes until golden
  • Remove from the oil and place on a sheet of kitchen roll to absorb any excess oil
  • Serve on a bed of rocket

Mini moules mariniere

Ingredients

  • 1 onion
  • 1 clove garlic
  • 2 tablespoons of oil
  • 500g mussels, de-bearded and carefully scrubbed
  • 1 bunch of herbs de provence or similar bouquet garni
  • 150ml white wine
  • 200ml double cream
  • Crusty bread to serve

Instructions

  • Fry the onion and garlic in the oil with the herbs in a large, deep saucepan
  • Tip in the mussels
  • Pour in the wine and simmer for approximately four minutes with a lid on until the mussels are open and pink in colour (discard any that fail to open with the heat – they’ve probably been dead for yonks)
  • Remove the parcel of herbs
  • Stir in the cream and cook for one more minute
  • Serve steaming in little bowls with plenty of crusty bread to mop up the sauce

And here’s the end product, yum!
Amuse-bouche

I’m just glad I didn’t do pudding. After the four types of wine we served with dinner, I’m not sure I would have been able to locate a plate, let alone serve up anything appetising!  Indeed, the hangover might be one of the reasons we still haven’t decided who won the competition…
Smokey Dauphinoise

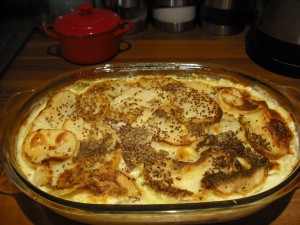
There comes a point in your life when you have to ask yourself this one, vital question: why am I reading the internet when I could be tucking into a lip-smacking bowl of smoked mackerel dauphinoise potatoes? I asked myself that very question when I came across this recipe on Domesticsluttery.com last week and immediately I found myself compelled to leave my computer, march to the supermarket and cook like my life depended on it. The result – after a quick switcheroo of the ingredients because I decided that using absolutely full-fat everything would result in a food coma from which I might never awake – is my smokey dauphinoise.

Dauphinoise

What goes in?

  • Three smoked mackerel fillets, flaked into pieces
  • Four large Maris Piper potatoes, thinly sliced
  • 200ml single cream
  • 200ml semi-skimmed milk
  • 1 tbsp whole grain mustard
  • 2 knobs of butter
  • 1 clove of garlic
  • Salt and pepper

What do I do?

  • Rub a small knob of butter around the sides and base of an ovenproof dish to coat it. Then halve a clove of garlic and rub the two halves round the dish as well so you have a pungent, garlicky starting point for the dish.
  • Layer the finely sliced potatoes across the bottom of the dish, sprinkle across some of the mackerel and repeat until the dish is full (the top layer being potatoes).
  • In a bowl, mix the cream and milk together thoroughly and stir in the mustard.
  • Dot a few smears of butter across the top of the potatoes and pour over the milk, cream and mustard mix. The mustard seeds might settle on the top but this will make for an extra crunchy, hot top layer.  Season with a bit of salt and pepper.
  • Pop the dish in the oven at 160C/325F/Gas 3 for around 45 minutes and remove when the top is just passed golden brown in colour and the sauce is bubbling underneath.

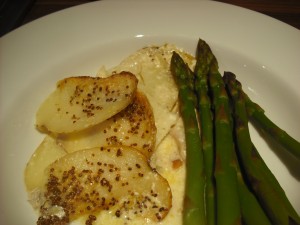
Serve up generous helpings – this recipe should feed four hungry people – accompanied by plenty of green veg. Yum!
Dauphinoise served

(FAO Ben – I post this in direct response to your awesome mozzarella mash recipe. You should consider this the start of the Great Potato War 2010!)

Absolutely essential tomato sauce

Everyone has their own interpretation of a basic tomato sauce that can be used in all sorts of recipes. My version might find itself stirred into penne served with spinach and parmesan, added to a flavoursome soup, mixed into a vegetarian lasagna filling, poured over patatas bravas or smothering a homemade pizza base. It’s super-easy to make and a large batch can be frozen into useful-sized portions.

Sauce

What you need:

  • Tomatoes – adjust the amount depending on how much of the end product you’re hoping to end up with. 1 can of chopped tomatoes + six large fresh tomatoes + ten or so cherry or baby plum tomatoes = approximately 600ml of sauce. I try to use at least three varieties of tomatoes in my sauce to get a real depth of flavour.
  • Garlic – my philosophy is the more the better so, if you’re going for the amount of tomatoes mentioned above, I’d recommend at least three cloves.
  • Olive oil – four tablespoons of really good quality oil.
  • Balsamic vinegar – two generous tablespoons.
  • Soft brown sugar – three heaped teaspoons.
  • Herbs and spices – a teaspoon of dried mixed herbs will do or, if you have it, a handful of chopped fresh basil. Pinches of salt and pepper.

What to do:

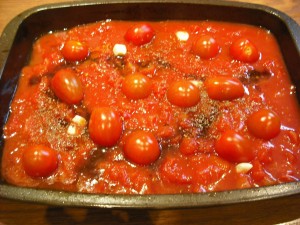
  • Pop all of the above ingredients, in the order listed, into an ovenproof dish.
  • Turn the oven up to 200C/400F/Gas and cook the sauce for half an hour.
  • Remove and leave to cool before blitzing in a blender until smooth.

Finished sauce

Ta-da! You now have a great sauce for use now or later and a kitchen filled with one of the best smells on the planet.

Deep purple beetroot soup

For months I’ve been meaning to write up my recipe for beetroot soup. Actually, it’s been so long now that I’ve committed it to memory and there really is no need for me to record it online. Of course, in the event that I get hit on the head and forget how to make this delicious, homely dinner – or, indeed, that you might want to give it a try – here’s the recipe…

Buy/scavenge/steal the following to feed four people:

  • 3-4 medium (about 500g) beetroot, grated coarsely or diced
  • 6 large (again, about 500g) ripe tomatoes, halved
  • 1 clove garlic, chopped roughly
  • 1 onion, finely chopped
  • Approx 2 tbsp olive oil
  • 500ml vegetable stock or good bouillon
  • salt and pepper
  • 125g feta cheese

Beetroot

What to do:

  • First you need to make a simple tomato sauce that will form the base of your soup. To do this place the tomatoes in an ovenproof dish, sprinkle over the garlic and drizzle over a good slug of the olive oil. Roast all that in an oven set at 190C/375F/Gas 5 for 25-30 minutes until soft and pulpy (do the prep for the rest of the recipe while this is cooking). When cooked, rub the sauce through a sieve to remove the skin and pips.
  • Heat a tablespoon of oil in a pan and sweat the onion for a few minutes until soft.
  • Add the beetroot and the stock and bring to the boil. Season lightly with salt and pepper. Simmer gently for 10 minutes until the beetroot is tender.
  • Stir in the tomato sauce and heat through, transfer the soup to a blender and process until completely smooth.
  • Reheat the soup until thoroughly hot but not boiling.
  • Divide between warmed bowls and crumble a little feta into each bowl. Serve with crusty bread.

Soup served

Top tips: Wear rubber gloves if grating the beetroot by hand to prevent staining and, if using a hand-held blender rather than a food processor, drape an old tea towel over the top when whizzing (I forgot this last time and our kitchen wall looked like the vegetable drawer had faced a firing squad).

Good veggie burgers: Halloumi & chickpea

Veggie-burgers have an awful reputation — with good reason. They usually fall in two deeply unsatisfying categories

  1. Creepy meat substitutes, which try and imitate beef texture, that taste utterly foul
  2. Soft and squiggy lumps, with the consistency of a fish cake, that slide out of the bun

As a fair-weather vegetarian I miss a proper burger, the kind you can put in a bun and eat without it squeezing out the sides or tasting like soggy cardboard. With summer fast approaching i’ve been on the hunt for a decent veggie burger recipe that’ll BBQ well. I found it in this BBC recipe which i’ve adapted each time i’ve cooked it over the last couple of months.

Ingredients

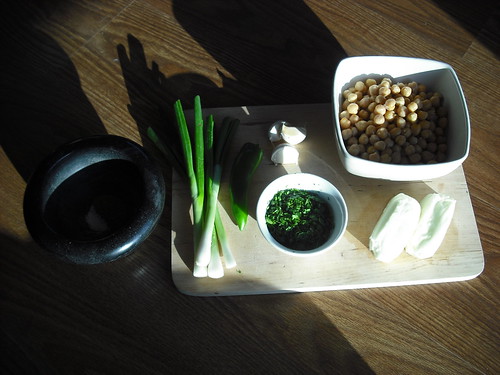
Halloumi burger ingredients

I like this dish a lot because it’s a combination of fresh and spicy flavours, but at the same time mostly ingredients you can either dig out of a cupboard or find in a local shop. Side note, they also freeze rather well too.

  • 1 pack halloumi cheese
  • 300g chickpeas (1½ cans, ish)
  • 2 tsp ground cumin
  • 1 handfull fresh coriander
  • 2 green chillies
  • 2 garlic cloves
  • ½ a small bunch spring onions
  • salt & pepper
  • Plain flour

Instructions

Smush together everything bar the halloumi in a big bowl. The original recipe recommended using a blender, I didn’t have one so I used a potato masher then fork and beat it till it was well mixed. Rather than finely chopping the halloumi it’s much easier to grate it. You want to aim for a clumpy texture that binds together well

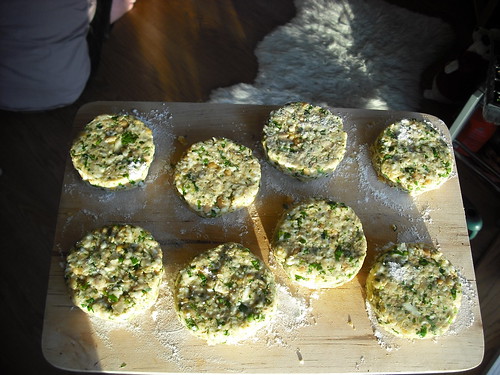
Halloumi burger patties

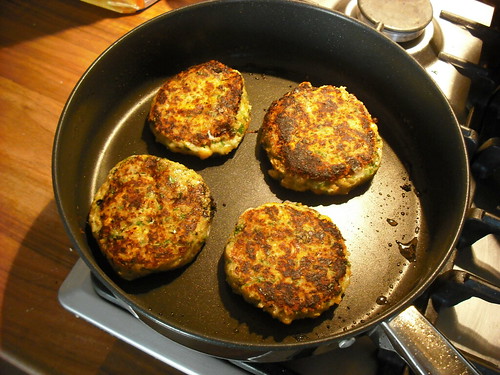
On a floured board form the mixture into burgers, about 8 or so. Watch out for an interfering kitten trying to help. At this point you could cook them straight away but i’d recommend popping them in the fridge for a little while. I tend fry them in a hot heavy bottom pan until golden on both sides, then give them a minute or two to cool before serving in a pita with salad/humus. OK, so not technically burger, but you could serve it in a bun if you like.

Halloumi burgers cooking

Cooking for one

Being home alone can mean that I swing one of two ways for dinner: I’ll either succumb to the lure of a Dominos pineapple pizza and the oh-so-wrong-oh-so-right garlicky dip that accompanies it, or I’ll take it as an opportunity to practice a new dish. As I plan to run round Battersea park for charity next month, greasy deep pan is not an option and I turned my attention to creating something equally satisfying in my own kitchen.

Let me introduce you to spicy butternut quesadillas and tomato salsa…

Squash Quesadilla

Adapted from a dish I was served a couple of years back in Masterchef winner Tomasina Miers’ fabulous Wahaca restaurant in Covent Garden. I’m yet to get my hands on a copy of her latest book, Mexican food made simple, but I’d hazard a guess that you will find some pretty decent modern Mexican dishes in there. The secret to getting your quesadillas crisp is to cook them in butter. A griddle is best if you have one, but a regular frying pan will do.

Ingredients

Ingredients

  • 500g butternut squash
  • 4 tablespoons vegetable oil
  • 1 diced white onion
  • 1 tablespoon minced jalapeno
  • 1 clove garlic, minced
  • 2 long red peppers (Poblano), roasted, peeled and cut into strips
  • Salt and pepper to taste
  • Flour tortillas (I’ll ask David to put his recipe for this up on the site soon but, in the meantime, shop bought ones will do fine)
  • A generous amount of grated cheese of your choice (I used a vintage cheddar, it isn’t Mexican but it was in my fridge!)
  • Butter for frying quesadillas
  • Garnishes: sour cream and/or salsa (recipe below) and a handful of salad leaves

Instructions

  • First, roast the squash. Preheat the oven to 200C/fan 180C/gas 5 and lightly oil a baking sheet. Peel and cut squash into 2cm chunks. Lay them on the baking sheet and roast for about 15 minutes, until soft but not cooked to mush. (You’ll finish it in the pan.) When cool enough to work with, pop it in a bowl.
  • Saute the onions, garlic and jalapeno in the oil until translucent. Add the pepper strips and cook for a couple minutes more. Add the squash and cook for another 5 or 10 minutes, until the squash is tender. Season with salt and pepper and take off heat.
  • Spread a few tablespoons of the cooked squash mixture onto one half of a tortilla. Sprinkle with a couple tablespoons of the cheese.
  • Fold over and place in a hot pan with melted butter, and fry for a couple of minutes on both sides until crispy.
  • Cut the finished quesadilla into triangles and top with your choice of garnishes. Eat while warm.

Smooth Tomato Salsa

Ingredients

  • 12 Vittoria tomatoes, halved
  • 1/2 bunch of spring onions, roots and green ends trimmed, roughly chopped
  • 3 garlic cloves, crushed
  • 2 jalapenos, roughly chopped
  • Pinch of allspice
  • Salt to taste

Instructions

  • Puree all ingredients together in a blender. Season with salt.

Cheesy!

Like a pizza it’s tasty, cheesy, tomato-y and crispy and, best of all, the feud between Mr Dominos and my bathroom scales is over forever!

Mozzarella Chili Mash

Periodically in San Francisco, our strong and tight-knit British community gets together and shares enormous meals. Usually, this is because our American brethren are celebrating meals with their families (Thanksgiving, Easter, Christmas) or celebrating being rid of us in the first place (Independence Day.) As much as I love it here, there is something cosy about getting together with your countrymen once in a while (plus some Canadians, Australians, occasional American impostor. Respect the commonwealth, yeah?)

Sidestepping a digression into my expatriated views on citizenship (better for another place), my recurring contribution to these meals is a quite fabulous mashed potato. I did it once, and it’s been requested since, and I’ve been promising the recipe for months. This is the most recent variation:

### Ingredients

  • 4 lbs of potatoes
  • Lea & Perrins Worcestershire Sauce
  • One large ball of mozzarella
  • 4 tablespoons of Créme Fraîche
  • 2 tablespoons of butter
  • A generous sprinkling of chili flakes
  • Salt and pepper

You’ll need a pan or steamer to cook the potatoes, a separate vessel in which to do the mashing, and a baking dish.

Pre-heat an oven to 400º F/200º C.

Method

The method is pretty simple. Skin the potatoes as you normally would (leave some skin in if you like the texture, don’t if you don’t), then boil or steam them with some salt until mashable. I tend to find that to steam them, I have to split them into two tiers on the steamer to fit; this is ideal, as you’re going to do the mashing in two steps.

Take half of the cooked potatoes, empty them into a bowl. Add a tablespoon or so of butter, two tablespoons of créme fraîche, a bit of pepper. Mash it up.

Your first batch of mash is done. Layer it evenly into the baking dish, such that you half-fill the dish.

Cut the mozzarella ball into slices; enough to cover the area of your dish. Tesselate them evenly on top of the first layer of potato. Onto this, drizzle a generous amount of Worcestershire Sauce, and a generous amount of chili flakes (to taste, but depending on how well you know the heat of your chilis, you should be prepared to be generous here: The potato, cream and mozzarella together will take a lot of the potency out of the chili when you eat it.)

Now, repeat the mash step with the second half of the potatoes, and create a complete layer on top of the cheese and chili. Fill the dish and seal in the filling. Whip the top of the mash with a fork, and brush it with a little oil or butter; you want the top of of the mash to go crispy.

Finally, put the dish into the oven at 400ºF/200ºC to bake for about half or hour, or until the top goes crispy and not-too-brown. I don’t see any reason that you have to bake it immediately, so you can prepare the dish earlier in the day and save cooking until the rest of your meal is synchronised.

Possible Variations

A few variations I’ve considered:

  • A second layer of grated, hard cheese on top. Something like cheddar, which will brown with the baking and make the top of the mash extra crispy.
  • Doing something radically different with the two layers of mash, such that the top will taste notably different from the base. I’m not entirely sure what (plausibly, use different roots: A layer of potato and layer of yam, for example.)
  • Bacon chunks. Obviously.

What are your favourite mash recipes?

Dying Baking (Eric RIP)

Last week I wrote with some enthusiasm about my return to baking bread, armed with a natural starter; yeast and flavourful bacteria cultivated daily from flour and water.

Well, it’s been emotional. As planned I fed my starter—Eric—once every two days, expanding his size and also rectifying his hydration, since I mis-measured the first flour:water ratio (updated picture here.) I was happy with the experience, there was notable expansion after feeding, and pockets of gas moving within the gloop to suggest that something was alive in there.

When it came to bake though, things didn’t work out. Using Eric as the base for my dough was entirely ineffectual. Five hours in warm sun resulted in no rise at all, and there was no rise in baking either. A solid, dense lump of baked dough was the disappointing result. For what it was, the flavour was pretty good, so I’ve got confidence in the benefit of the starter, but clearly I still have a lot to learn about the precise process.

To make matters worse, after the weekend’s baking, I came to feed Eric on Tuesday to find he’d developed a rather nasty case of mould. I’ll be scrapping it and beginning anew.

Eric in Dough

Dough not rising

Failed, unleavened Eric bread, with beer bread in the background

My reaction to the failures of this first bake are twofold, and with the second attempt, these are the things I’m focusing on to improve. First, the relationship between feeding time and the optimal point to use the starter in dough. Very simply, you’re supposed to feed the starter, and then make the dough at the most active point of the digestion cycle—when the starter is most expanded. I fed Eric the night before, but I didn’t time the dough production right. (I was very hungover and I got up very late, thus I think I’d missed the moment.)

Second, the bi-daily feeding cycle is a fine cycle, but the warmth and humidity of my apartment is too much to leave the starter sitting out in the room. I’ve got an array of south facing windows here, and I think that’s too much for to baking once a week at most. Son of Eric will be kept fridge-bound to stay mould-free. He’ll be slower eating as a result, but I think that will be fine with my schedule.

Faced with a failed loaf and a room full of dinner guests, you may wonder what I did to save the day? I fell back on a reasonably quick beer bread recipe, which goes like this:

If you’re really having an emergency, you can adapt this with baking powder rather than yeast to get a quicker rise. The texture will differ, and you’ll probably want to bake in a tin, but you’ll still get a yeasty flavour from the beer.

The most important thing when using yeast is to remember to slightly warm the beer before you add it, and certainly don’t mix it cold from the fridge; the yeast needs to be warmed to activate. Mix all of the ingredients into a dough, add more flour until you’re happy with the consistency, and then kneed for 15 minutes. I left it to rise for two hours, I’m sure that more would’ve been better (as would kneading a second time) but when it came to it, the bread rose further still in the oven.

The result was plenty adequate, not too heavy, and the IPA gave an edge to the flavour that I really enjoyed. It’s set me thinking about other beers to bake with. Young’s Double Chocolate Stout and Sam Smith’s Oatmeal Stout both spring to mind, and may be subject of some experimentation this weekend.

Living Baking

I like the way we are rarely in control of bread dough, the way it appears to have a mind of its own. And why shouldn’t it – yeast is, after all, very much a living thing. We spend too much of our cooking time trying to be in charge of our ingredients, of making them do only what we want them to. Bread dough will often resist our attempts at complete control, and will rise or fall as it wishes, take its time or surprise us with its spontaneity.

— Nigel Slater

I love bread. I grew up first provided with nice fresh loaves from local groceries, and later—after Dad got his first bread maker—a cavalcade of elaborate breads containing nuts, cheese, olives… and so forth. Put a meal in front of me and I will sample the bread first. Whilst this could segue into a piece on how brilliant sandwiches are, I want to introduce you to something.

This is Eric. Eric is my new starter.

"Dough starter in a tub"

Local Mission Eatery is a splendid new spot on 24th Street, serving great soup and sandwiches during the day and very excellent set dinners twice a week. They also host labs, where members of San Francisco’s food community host 90 minute sessions on their areas of expertise. On March 25th, SFBI student and Sour Flour founder Danny Gabriner ran a session on bread, particularly the craft of creating and maintaining a natural starter.

A natural starter is as opposed to baking with commercial yeast. By combining flour and water, enzymes break down starch in flour, producing sugars for yeast and bacteria to eat. By feeding your starter with more flour and water on a regular cycle, you cultivate yeast and bacteria, and shortly, you’ll be able to break off a piece and use it as a base for bread dough. This cultivation will also produce strong flavours, which in turn affect the bread.

Danny’s class was a frantic, occasionally scattered affair to a group of around twenty active, interested and prospective bakers. I had no idea what a starter was when I arrived, but had done enough baking in the past that I was able to fill in or defer the knowledge gaps until later in the session. I wonder that someone with no baking experience might have struggled with the details, but would at least have come away quite inspired. The core learning I came away with though, was that whilst the creation and maintenance of a starter is a fairly scientifically careful affair (trying to feed on a regular schedule, maintaining a consistent ratio of flour to water), there also seems to be complete flexibility in what that schedule and ratio can be.

You can maintain a starter by feeding it daily, bi-daily, weekly, even slower if you keep it in the fridge to slow down the yeast. Likewise, you can maintain very dry, dough-like starters or super-hydrated, almost liquid starters that will fizz and bubble after you feed it. Danny was entirely unwilling to commit to any one kind of starter as being ‘correct’, nor does having a wet starter preclude you from making a stiff dough (nor vice versa.)

It was also clear that even if you screw it up, the starter probably isn’t dead and you can rescue it. The starter itself can live indefinitely; you break off a piece to bake with, and feed the remainder. Some starter maintenance techniques will have you discard some of the starter before you feed, to keep the overall size down, and keep it under control in its tub.

There’s a huge amount of information to it, and Danny has very helpfully blogged his presentation notes on the Sour Flour blog.

One thing that was definitely clear: You should give your starter a name. It’s alive, after all. Which brings us back to Eric. Everything in my family has gotten named Eric at some point, so in my slow progression toward Becoming My Father, this starter is named Eric, too.

In the interests of keeping this as simple as I possibly can for myself, Eric is a 100% hydration starter, which means he’s made up of equal quantities of flour and water (50g each, in this first mixture.) I’m using white, non-bleached bread flour (with a view to making French baguettes like sometime previous), and I’m going to feed him every two days, because I intend to bake once a week at the weekend, and that seems like a fair way to build up the quantity slowly. You see how I’m employing guesswork already? Right. Good.

Next weekend, or maybe in a fortnight, I’ll bake a loaf with Eric. Unless it doesn’t work.

You can read more about Danny Gabriner’s Sour Flour operation in a profile by Mission Local, which is an excellent read in its own right.

Food in design

Stuff that makes you go nom doesn’t always have to be on fork or in a martini glass.  In fact, the aptly named Studio Nommo – a Turkish interior design company – produces this delectable wallpaper which allows you to cover your kitchen with so many packets of Ritz biscuits and bottles of wine  (not to mention NES controllers‽) that you may well have to resist the urge to lick the walls.

Wallpaper

Nom (via India Knight).