Growing your own bread starter

When Ben visited us this christmas gave me a copy of the beautiful Tartine bread book. Since then i’ve been learning to grow my own yeast and making experimental sour dough with varying results. I’ve been growing my starter, dubbed Eric/B, for almost a month without killing him and produced 4 good loaves using the basic Tartine recipe. An off-cut of of Eric has even made his way to South London in the form Eric/B1, a gift to our our newest munchmun.ch contributor, Kriss.

I promised Kriss a post explaining how and when to feed his new friend, but if you’re not using an existing starter then you can make your own really easily. Just combine 100g flour mixture and 100g water follow the instructions for feeding the starter while omitting the kept start and add extra flour and water. Leave it a couple of extra days to get going before feeding, then continue as normal. This guide is a bit rough, but should be enough to get you going,

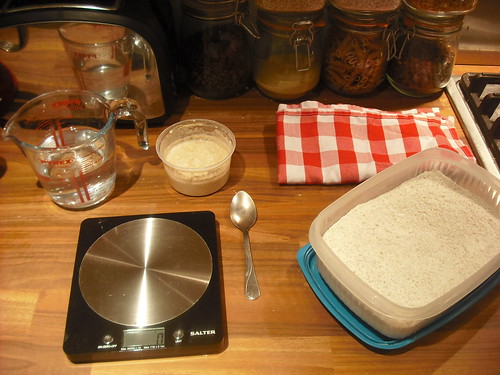
Tools of the trade

  1. A plastic tub to store the starter in. I’m using a supermarket humus-type pot.
  2. Kitchen cloth to go over the top of the pot, it might get messy. This helps avoid the mixture drying out too much/crusting on top
  3. Your flour mix, mine is 50% wholewheat, 50% white bread flour. Make a large batch of it up so you don’t need to mix it each time.
  4. Electric scales. You can use regular scales will do, but precision of digital and the easy of reseting to 0 make life much easier (I recommend these)

First question, what time to feed? I’ve been following the Tartine suggestion of doing it in the morning, but it seems theres no hard or fast rules. Find a time that works for you and stick with it, the most important thing is a consistant time. You’re “training” the yeast to rise and fall in cycle in preparation of using it to bake with.

Next, how does feeding work? The short version; remove 80% of the starter and replace the flour/water. This prevents the culture becoming too sour and vinegary while still developing the culture for baking with.

Take your existing yeast culture and clean off any dried bits round the top of the pot, or peel of any heavy crust that may have formed. Give the remaining mixture a good stir to get an even consistency, then remove all but 40g and reset your scales. Add 75g of your flour mixture and 75g of water and mix carefully. If you have a small pot then this will probably make a bit of a mess.

Pop the cloth over the top of the pot and put it somewhere with a reasonably warm consistant temperature. You can then decide how long you want to wait till feeding it again. Personally i’m feeding Eric once every 2 days, rather than the once a day I was doing, as i’m not actively baking at the moment and he was a lot of time/flour to feed everyday.

What if you miss a feeding? Don’t worry too much, it’s better to wait until the next planned feeding rather than feed out of your cycle. Your starter should be pretty resilient

I’ll be posting some recipes/pictures from my recent sough dough experiments soon, so once you have your own stable Eric you can bake with him. I just need to get the knack of it myself first, before I try and teach.
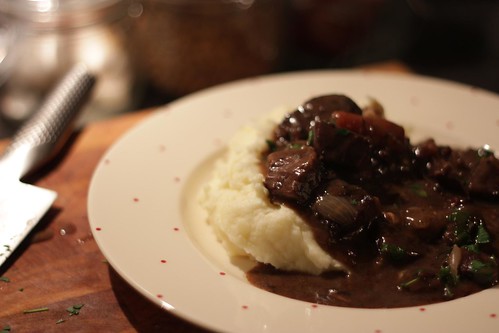
Beef en daube

I’ve been a self-confessed foodie for years now, and after several suggestions from the usual authors in the past I’ve finally managed to find my way here. I hope that I can provide some interesting recipes and culinary adventures for your general cogitation.

Wanting to branch out from my usual beef stew favourite of Carbonnade à la flamande I found a recipe by Allegra McEvedy that looked to be very much worth a try. It was followed pretty much faithfully and produced incredible results, but in future I will probably stick to making it in my cast iron dutch oven instead of a roasting tin.

Beef en daube
Ingredients

  • 1kg braising steak
  • 100g cubed pancetta
  • 1.5pts red wine
  • 1.5pts beef stock
  • 1 tin of beef consomme
  • 10 shallots
  • 5 carrots
  • A handful of flat leaf parsley
  • A small bunch of fresh thyme
  • 5 garlic cloves
  • 50g butter (optional)
  • 1bsp plain flour (optional)

Instructions

  • Heat a roasting pan on the hob with a good glug of olive oil
  • Add the pancetta and thyme to the pan and turn down to medium heat
  • Peel the garlic and shallots, leaving both whole, and add to the pan and sweat for 10-15 minutes until the shallots are going soft and translucent
  • Pour in the red wine and scrape the crispy bits from the bottom of the pan, then simmer for 5 minutes
  • Cut the braising steak into cubes, season, and add to the pan on top of the shallots
  • Pour the beef stock and beef consomme over the beef and bring up to a simmer
  • Peel the carrots, cut them into big pieces and add to the pan
  • Cover the pan with foil and place into a preheated 170° oven for 2-3 hours or until the beef is tender
  • (optional) If you want the sauce to be thicker, drain it off into a separate saucepan, whisk the butter and flour together to make a beurre manié, and whisk into the sauce. It thickens quickly, so add it gradually until you get the desired effect!

I served this up with a a big pillow of buttery mashed potatoes and found it deliciously rich, with a deep flavour to the beef from all the red wine it’d sucked up. Definitely a meal that I’ll be adding to my list of regulars for times when it is particularly cold and windy outside.

Brownies

Brownies – and the content thereof – is a subject of much ongoing debate.  A friend on Twitter recently asked for a good recipe and received a number of wildly differing recommendations.  Some people vehemently argue the case for the use of 75% cocoa solids chocolate, others fight the corner for the addition of fruit or marshmallow.  Hell, there are even some weirdoes out there who really push the brownie boundary with an apple-based variety.  Madness.

This is all very well and good but, in my view, there’s nothing comparable to that bitter feeling of disappointment when you realise that the warm chocolate brownie with hot fudge sauce on the pudding menu is not a squidgy, gooey-bellied delight but a false promise of chocolate goodness containing dangerous little nut grenades.  Let’s get this straight people, WHOLE OR CHOPPED NUTS HAVE NO PLACE IN A BROWNIE.  There, I’ve said it.  I will not hear any arguments to the contrary.

Here is my nice, safe, NO VISIBLE NUTS, recipe for a decent brownie…

Ingredients

  • 225g dark chocolate (85% cocoa solids is best)
  • 225g unsalted butter, cut into cubes
  • 100g caster sugar
  • 3 tsp Vanilla essence
  • 3 eggs, beaten
  • 150g fine ground almonds (this is a perfectly acceptable form of nuts, they are ground to within an inch of their lives.  These are stealth nuts.)

Instructions

  • Preheat the oven to 170°C and line a square tin with baking paper
  • Melt the chocolate and butter together in a saucepan
  • Remove from the heat and tip in the sugar
  • Stir mixture well and add in the vanilla
  • Using a hand whisk (not an electric one), whisk in the beaten eggs
  • Continue to whisk the mix for a further two minutes or so until the ingredients are well combined and the mixture is completely smooth
  • Stir in the ground almonds
  • Pour the mix into the baking tin and cook for 25-30 minutes.

When you remove your brownie from the oven the top should be crispy and cracked.  When you cut into it (you’ll get about 12 generous squares out of this recipe) the middle should be dense, squishy and free from threatening little nuts.  Hah!

Knockout Lemon Tart

Regular readers of this blog will realise that while I love cooking in general, creating puddings, sweets and bakes is what really gives me my culinary kicks. 

Almost a year since my first visit, I’ll soon be heading back to Leith’s School of Food and Wine.  This time it’s courtesy of my best friend (and devout worshipper of the sacred cinnamon swirl), Fiona.  She’s decided that the one thing I need to improve my life, and presumably hers, is the ability to construct a perfect Sicilian lemon meringue sundae.  As such, I am being sent on a ‘Retro puddings workshop’ and shall return laden with treats.

In the meantime, here is a recipe for you that I didn’t have to go to school to learn.  I often used to boldly state that “I don’t do pastry”.  That was until just over a month ago when I decided that, having been given the task of cooking dessert for ten on Christmas day, I should face my pastry demons.  As an alternative to the sticky, heavy, boozy Christmas pud produced by my mother I thought I’d try my hand at some zesty lemon tarts.  Lo and behold, they did not burn, they did not flop and they did not fall apart!  Such was my joy at this, I am sharing my recipe* so that you too might feel like the cook you’ve always wanted to be…TartPastry

Ingredients

  • 255g unsalted butter
  • 200g caster sugar
  • 1/4 tsp salt
  • 2 eggs
  • 500g plain flour

Instructions

  • In a large bowl combine the butter, sugar and salt by mixing until smooth (I use a hand-mixer)
  • Mix in one of the eggs until smooth and then do the same with the other
  • Add the flour all at once and then mix on a low speed until incorporated
  • Tip the mixture on to a lightly floured work surface and divide into four and shape into a disk about 2cm thick
  • Wrap the disks in clingfilm and chill for two hours
  • Roll out pastry (do this quickly and avoid touching the dough too much) to the thickness you want – but no more than 1/2cm – and cut to fit your tart tin (you’ll get about 12 individual tartlets from this recipe or 4 nine-inch tart shells)
  • Press pastry into the tin, trim with a sharp knife and pop into the fridge for a final ten minute chill
  • Cook for a maximum of 10 minutes in a 190 degree but keep an eye out and remove them when golden brown in colour
  • Cool them on a wire rack and get on with making the filling

Lemon cream filling

Ingredients

  • 155ml lemon juice
  • 3 eggs & 1 egg yolk
  • 170g caster sugar
  • A pinch of salt
  • 225g unsalted butter

Instructions

  • Set up a bain marie on the hob
  • Combine the lemon juice, whole eggs, egg yolk, sugar and salt in a bowl
  • Place the bowl over the boiling water a whisk the ingredients together immediately
  • Keep whisking for 10 minutes or so (sorry, this takes some elbow grease) until the mixture becomes very thick
  • Remove the mixture from the heat and leave to cool slightly (about 60 degrees – ie still hot-ish – should do it)
  • While the mixture is cooling cut the butter into one-inch cubes
  • Using an electric whisk, mix the each cube of butter fully in to the warm mixture and then add the next, once all the butter is gone give the mixture one last thirty second blast with the whisk and you should be left with a thick, pale and glossy cream

Pour the lemon filling into your tart base, smooth out and leave to set in a fridge for at least 15 minutes.  All that’s left to do now is try not to look too smug when everyone exclaims how amazing it tastes.

*based on a version that appears in this cookbook

Roast Potatoes and Red Wine Vinegar

This evening I continued a new trend for hosting a small number of my friends for a medium-sized dinner party. Is ‘twice’ a trend? Perhaps. Last week was curry (that is, Indian food via Britain) and this week was a roast chicken dinner. There’s quite a lot to write about both, and the absence of a write up of the former means I’m going to post a very short thing about the latter, with more pending.

The roast potatoes accompanying the meal were derived from this recipe by Gary at Roast Potato. Everything about that preparation worked pretty well for me (and I should emphasize his point about cooking the potatoes beyond parboiled so that they flake at the edges.) Particularly effective though was one final touch: Near the end of cooking, once potatoes have started to crisp, add a dash of red wine vinegar. Tasted brilliant.

Cooking with Reddit

Reddit’s 2010 comment of the year vote came around, and one popular thread was this: I have $13 until my next pay check. In response, user Electric Sandwich proceeds to stream a whole set of cheap, delicious sounding Puerto Rican recipes for rice, pork shoulder and twice-friend plaintains in inimitable style:

Buy yourself a nice meaty pork shoulder. 5 lbs should do nicely.
Bring that fucker home and get out a long, thin knife.
In a pilon (that’s a mortar and pestle gringo) smash up a few cloves of Garlic, some sazon, some, salt, some pepper, and some oil.
Grind it up GOOD. Now you have another ghetto sofrito.
Take your knife and stab some holes in the pig. Twist the knife around so the holes get nice and wide.
Now, take some of your sofrito and stuff it into the holes. Don’t be shy blanco, ram it in there. Use the remainder to roughly coat the outside of the pig. RUB IT. CARESS IT. This pig died so that you may eat. Salt that shit all over the outside and crack some fucking pepper on there.

Further down, user TVArmy has a recipe for pan-friend pizza:

Get out a cast iron or nonstick skillet. A conventional skillet will do in a pinch. Put down a film of olive oil (or veggie oil if you don’t have olive oil), and heat it up until it shimmers. Put the dough in, and cook it until it gets brown on the bottom. About 3 minutes, but lift up the corner to check earlier. Push down any big bubbles. Flip it, and wait about 3 minutes again.

Also in the thread are links to more recipes on The Awl, and Mojo de Ajo.

Ingredients

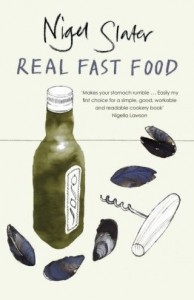
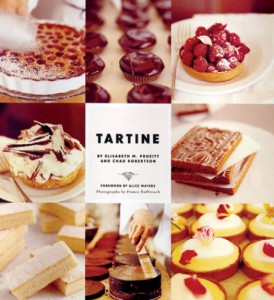
These days, I’m getting more and more adventurous with my cooking.  Not just with what I eat, but with what I buy and how I cook it.  This may well stem from recently receiving two cookbooks as presents that are poles apart when it comes to the ingredients required and the skills needed to create the dishes.  For the first time ever, leafing through the pages of Nigel Slater’s Real Fast Food, I had the glorious thought “My god, I’m just too good for this book”.  Conversely, when fellow munchmunch-er Ben produced a copy of Tartine’s patisserie volume, there was a good long pause as I considered the fact I may well need to invest in a confectionary thermometer.

Slater

Tartine

I think I’m moving away from my preferred method of ‘throwing everything into a dish and hoping for the best’ but no matter how many new recipes I try and meals I create, 9 times out of 10, you can be guaranteed that I’ll try and make use of my ‘safety ingredients’.

The French have their mirepoix, the Italians soffritto and the Chinese,  yuxiang.  I, however, have my safety net of garlic in savoury recipes and vanilla in sweet.

I put garlic in almost everything in varying amounts (from a delicate half-clove to teaspoon upon teaspoon of pungent purée). Even if it doesn’t really go, I don’t care.  Every dish has to start somewhere, so why not be with garlic? 

My passion for baking means that I have a similar affection for vanilla in all its forms: pods; seeds; extract; and powder. You name it and vanilla will have found its way into my cakes regardless of whether or not it’s strictly needed.

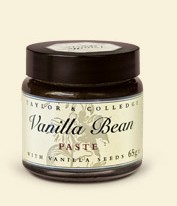
Which brings me to my favourite vanilla-y discovery and the entire purpose of this rambling post:  Taylor & Colledge’s vanilla bean paste.   Made using 100% natural vanilla beans,  I only discovered this pretty little jar of yumminess a few months ago and already it’s become key to my baking.  As well as being a super-quick alternative to scraping out vanilla pods, just opening up the pot releases what is – in my view – one of the most delightful smells in the world.

vanilla

So, these are my go-to ingredients and I absolutely couldn’t live without them. Everyone has an ingredient that they couldn’t live without.  So what’s your absolutely favourite ingredient that you must, must use?

H Forman & Son

I can say with confidence that we have dined at the most British of British restaurants. It’s in the capital overlooking the site of the 2012 Olympics, it dishes up salmon that’s been ‘London cured’ on the premises since 1905, it serves glorious syrup sponge puddings steaming in individual Tate & Lyle tins. Oh, and it’s got its own coat of arms!

FORMANS

H Forman & Son is just moments from the Counter and the Hackney Pearl so, in theory, you could have a rather lovely day-long food tour of this decrepit part of Hackney. Highlights of our evening meal included a miniature copper saucepan containing yellow, buttery, fluffy Jersey Royals that accompanied the smoky eel fillet starter (though the eel itself must be an acquired taste) and the sea bass which married very well with a sweet vanilla froth.

Mind you, the meal was not the only well conceived thing about Formans. You can wander round the Smokehouse art gallery on the second floor while you wait for your table. Although we dined late and missed opening hours, the friendly doorman assured us it is well worth a look. The wine menu was extensive – huge glass-fronted wine coolers registering a different temperature for each type of grape line the walls as you enter the restaurant, daring you to get sozzled in the shadow of the Olympic stadium. The pièce de résistance, however, was the walk to the loos. No joke. A darkened corridor with stainless steel portholes allows diners to peer down onto the smokehouse. Ghostly and clinical in the evening, the factory floor is home to a kiln-shaped smokery bigger than most East London flats. If there’s anything that adds to an already special meal out, it’s a little bit of adventure and a large helping of industrial cookware.

FORMANS2

Breakfast Tomato Sauce

Two Christmases ago, my second since moving from London to the US, David took me to The Counter in Hackney Wick, East London. Their specialty is a thick, sweet, tomato relish served on the side of a variety of delicious breakfasts. Ever since, I’ve always held a special affection for a well made tomato sauce and whilst making a breakfast spread this morning, tried to improvise my own. One thing that the America fried breakfast can lack is moisture, since they don’t do baked beans here. The tomato sauce works really well.

There are all kinds of potential that could be done here, but this first base version was delicious.

###Ingredients

  • 1 can of roughly chopped tomatoes.
  • 1 leek, finely sliced.
  • 2 tablespoons brown sugar
  • A teaspoon of cider vinegar
  • Worcestershire sauce
  • A little salt, a generous amount of pepper
  • Olive oil

Heat a pan to medium heat, add a splash of olive oil (less than you’d usually use; just enough to coat the leek.) Add the leaks, immediately drop the heat a little, soften them and season with salt and pepper. As the oil is absorbed by the leeks, add the cider vinegar to prevent them drying out or burning. Pour over the entire can of chopped tomatoes, stir and heat to a simmer. Then add the sugar and stir in.

You’ll now need to let it simmer some more, so that it starts to reduce and thicken. In my case, I let it go for twenty minutes, then tasted it and added a generous amount of ground black pepper; about three teaspoons. A dash of worcester sauce to finish, the pan was left to simmer on a low heat for around another twenty minutes whilst the rest of the breakfast was prepared.

The result is a thick, chunky tomato sauce with spice and sweetness. It was brilliant.

You can likely accelerate the process by draining the canned tomatoes, working at a higher heat, or even adding corn flour, but as with the best ragus, the key to getting sweetness from the leeks (or onions, or shallots, or whatever you like) is to fry them as slowly as you can.

Sky garden spuds

Boil ’em, mash ’em, stick ’em in a stew. Or, in our case, grow ’em on a third floor balcony in Hackney and tuck into ’em fresh out of the earth.

Potatoes

We’d been tending these glorious potatoes (Organic Orlas and Maris Peers) since early March and enjoyed a continuous harvest from mid June until the final batch was uprooted last week. There’s such pure joy in digging up the bounty, quickly boiling the little golden vegetables and devouring them coated in nothing but real butter and fresh mint.

It’s all about making the most of our limited space and the handy planter bags that we used to grow our spuds have immediately been refreshed and replanted with carrots for the autumn.   Have you tried creating an urban kitchen garden?  What would you recommend we grow now?